Learning Django
(updated 2021.1)
Related:
Learn Python
Ref: This is a combined learning note of:
- basic level sentdex’s youtube tutorial 2016, the corresponding video+text one is here.
- official tutorial which is still too complicated for new users, so better to use that after following this blog.
- middle level another tutorial: Django Tutorials for Beginners 2016
- book “O’Reilly 2014 - Test-Driven Development with Python (django 1.7)”.
- official docs: DOCs.DjangoProject.com.
- all-in-one 3.8-hour video. Python Django Web Framework - Full Course for Beginners 2018 w/ Code (in sublime).
Update: newly tested w/ Ubuntu 1804 + py 3.8.5 + django 3.1.
Install #
python 3 (inc pip), make sure added to PATH,
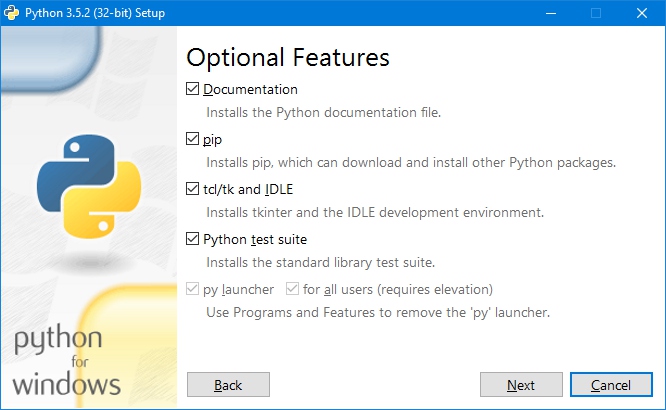
then pip3 install django==3.1.1 (old: v1.7)
Start a Project/Site #
start #
mkdir myProject
cd myProject
django-admin startproject mySite
tree
>└─djangoSunnySite # container folder
>    └─djangoSunnySite # settings folder
There will be a file ‘db.sqlite3’ in the container folder, because sql-lite is the default DB for python.
set git to ignore ‘secret_key’ #
see: git – Ignore Sensitive/Secret Lines
run server #
cd <container folder>
manage.py runserver

check naming convention (naming rules) #
Start an App (Under a Site) #
start #
manage.py startapp <appName>
the folders should look like this now:
└─djangoSunnySite       # container folder
    ├─app111            # one app folder
    │  └─migrations
    ├─appSunny2         # another app folder
    │  └─migrations
    ├─app_underline     # another app folder
    │  └─migrations
    ├─webapp            # another app folder
    │  └─migrations
    └─djangoSunnySite   # settings folder
        └─__pycache__
// (i use ‘app111’ as the ‘personal’ app in the video)
Warn: we should START an app before registration!!!. Otherwize, manager.py will give errors: ImportError: No module named '<appName>'.
Warn: after creating db tables, table’s name is fixed together with app name, so renaming app means also renaming db’s table name (or copy the table if we should not delete the table).
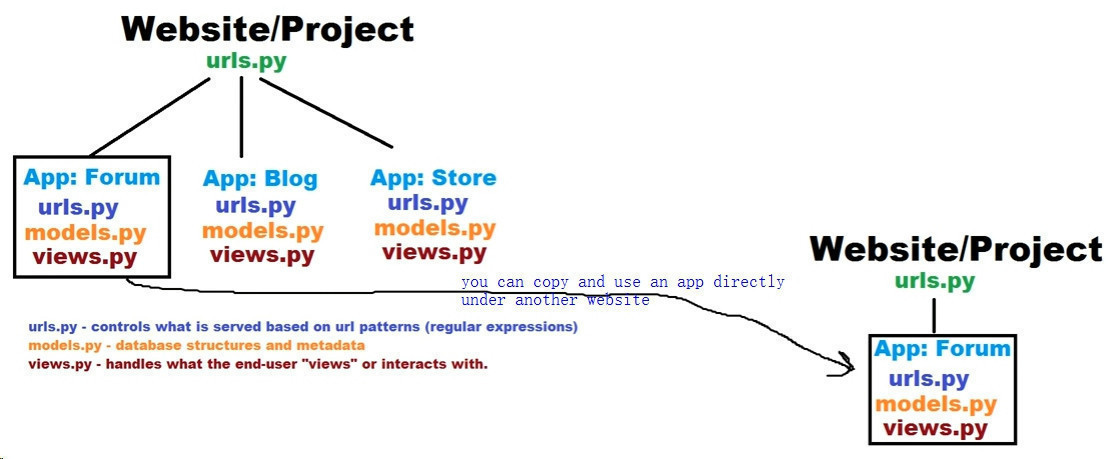
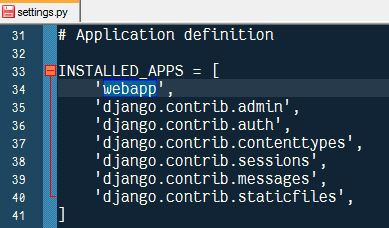
register the app in settings.py #
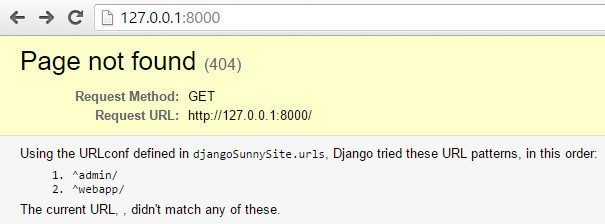
config route to the app in the project’s main urls.py #
vim <settings folder>/urls.py
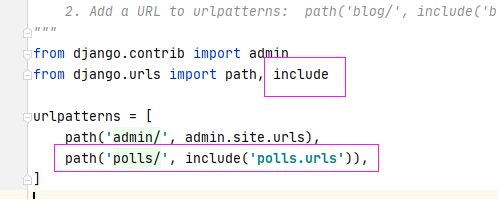
(fig. is showing the official tutorial, code is not)
from django.contrib import admin
from django.urls import path, include

urlpatterns = [
    path('admin/', admin.site.urls),
    path('webapp/', include('webapp.urls')),
]
Note: ‘webapp’ is the name of app, ‘urls’ is the file name of ‘urls.py’ without extension. If the being called urls.py file does not exist, there will be exception.
add a (function-based) view, in app’s views.py #
cd <app folder>
vim views.py
from django.shortcuts import render # this statement is automaticlly added when creating apps
from django.http import HttpResponse
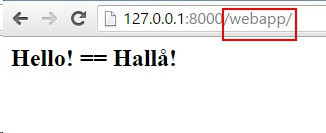
def index(request):
return HttpResponse("<h2> Hello! == Hallå! <h2>")
register the (function-based) view in app’s urls.py #
cd <app folder>
vim urls.py
from django.conf.urls import path # previously "import url"
from . import views # . means import from current package

urlpatterns = [
    path(r'^$', views.index, name='index')] # "r" means regular expression, "view" is file name, "index" is the function in the file
run server #
and:
jinja Templates #
// sunny created another app “app111”
add route to the page “mypage.html” #
vim <app folder>/urls.py
# the same as the previous urls.py
from django.urls import path, re_path # note: "re" stands for regular expression

from . import views

urlpatterns = [
    path('', views.index, name='index'),
    re_path(r'^\d+$', views.reg_index, name='reg_index'),
]
vim <app folder>/views.py
from django.shortcuts import render
# this time, we use render() instead of HttpResponse()
def index(request):
    return render(request, '<app name>/my_page.html')
create a template for header “header.html” #
cd <app folder>
mkdir templates # plural

cd templates
mkdir <app name>
OBS: all apps’ templates’ content are shared, so it is necessary to have another layer to distinguish apps, and usually, it has the same name as the app.
vim templates/<app name>/header.html
<!DOCTYPE html>
<html>

<head><title> a title </title></head>

<body>
    <div>
        {% block my_content %}
        {% endblock %}
    </div>
</body>

</html>
use the template in “my_page.html” #
vim templates/<app name>/my_page.html
{% extends "<app name>/header.html" %}  <!-- NOTE: relative, all templates use 'templates' as its root dir -->

{% block my_content %}
this is sunny's template test page.
{% endblock %}
create another smaller snippet-template to be included #
mkdir templates/<app name>/includes/ # also plural
vim   templates/<app name>/includes/small.html
{% block content %}
<p>i am a small snippet, and i have been included multi times.  </p>
{% endblock %}
modify “mypage.html” to use this snippet:
{% extends "<app name>/header.html" %}
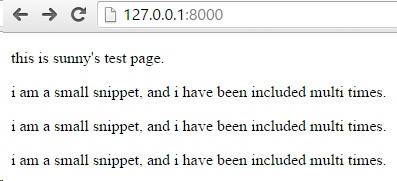
{% block content %}
<p>this is sunny's test page. </p>
{% include "<app name>/includes/small.html" %}
{% include "<app name>/includes/small.html" %}
{% include "<app name>/includes/small.html" %}
{% endblock %}
run server #
notice, obs #
files like “header.html” /shared templates ?/ are usually used everywhere and every page for a site, not so many files.
files as snippets are used somewhere, but the amount of files are more than “shared templates”.
reading list #
Simple Logic & Loop Control by sentdex / Harrison
Quick Examples, Super Blocks, Macros
Boostrap #
install #
getbootstrap > getting-started > download
mkdir <app folder>/static/
Unzip bootstrap and put the folders (css, fonts, js …) to static.
OBS 1: The folder name “static” a default value and can be changed by editing the site’s settings.py.
OBS 2: Similar as “templates”, the “static” folder is also shared by all apps. However, this is usually general for the whole site, so we didn’t create another layer of folder.
use #
Edit <app folder>/templates/<app name>/headerBootstrap.html to include bootstrap:
...
    <head>
        <title> a title </title>
        {% load staticfiles %}
        <link rel='stylesheet' href="{% static 'css/bootstrap.min.css' %}"></link>
    </head>
...
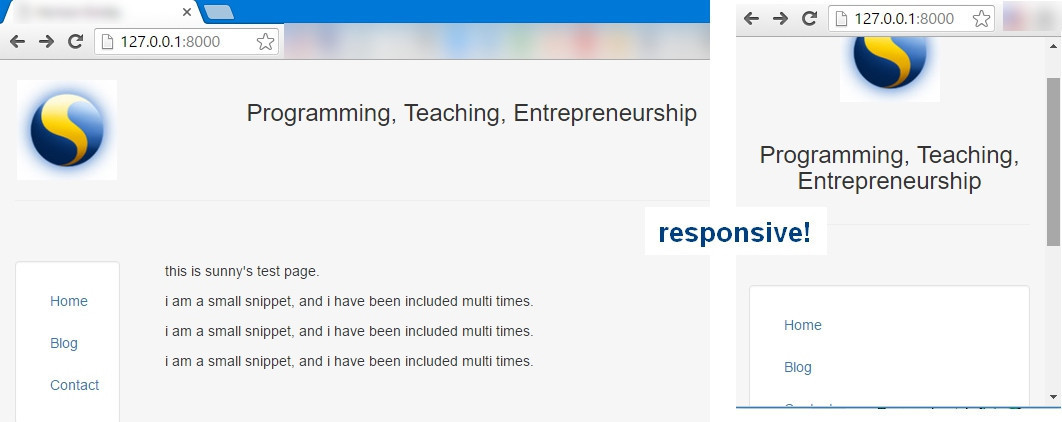
After adding some content, the header file is bigger, the full header html content is here or origin as backup here.
Let’s modify <app folder>/views.py to re-route the default home page to this file.
from django.shortcuts import render

def index(request):
    return render(request, '<app name>/mypageBootstrap.html')
run server #
Passing Variable from Python Function-Based View to Jinja #
add a view #
add a new function-based view in views.py:
vim <app folder>/views.py
...
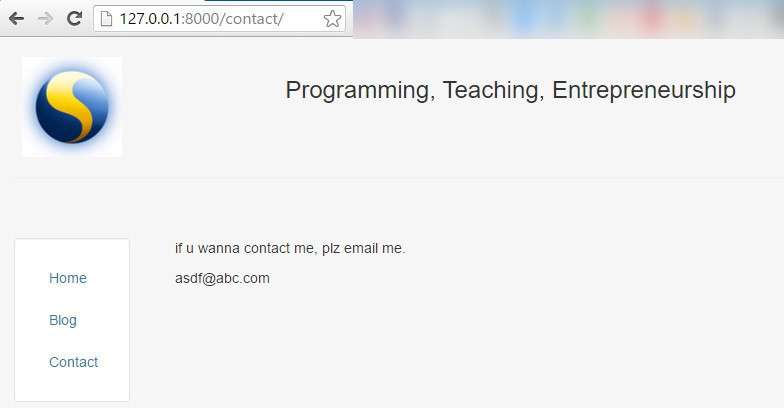
def contact(request):
return render(request, 'app111/basic.html', {'content':['if u wanna contact me, plz email me.', '[email protected]']})
# The function-based view contact() has a dictionary as the last parameter. The dictionary has 2 strings.
add a template html file for the new view:
touch <app folder>/templates/<app name>/<file name: basic>.html
vim <the above file>
{%extends 'app111/headerBootstrap.html' %}

{%block content%}
    {% for tcString in content %}
    <!-- this "content" is the variable's name passed from views.py's function-based view `contact()`, and it is different from block's name in "block content", and, there is no conflict!!! (sunny: i prefer to use another varialbe name) -->
        <p>{{tcString}}</p>
    {% endfor %}
{% endblock %}
Tip: The spaces at the beginning and end of {% %} don’t matter.
Tip: To print a varialbe in jinja: {{ varName }}, spaces don’t matter either.
Tip: Flow control: “for loop”.
run server #
Class-Based Generic View (ListView & DetailView fr. models.py) #
Will use a new app “blog” to do this.
start a new app (e.g. blog) #
manage.py startapp blog
vim <setting folder>/settings.py
...
INSTALLED_APPS = [
    'blog',
...
vim <setting folder>/urls.py
...
urlpatterns = [
    path('blog/', include('blog.urls')),
...
We will use two types of view (list view & detail view). ref: doc: Generic display views
Thus:
vim <app folder>/urls.py
from django.conf.urls import url, include
from django.views.generic import ListView, DetailView
from blog.models import Post # we need a DB table/model named "Post"


urlpatterns = [
    path('', ListView.as_view(queryset = Post.objects.all().order_by("-date")[:25],
                                template_name = "blog/blog.html"))
# Tip: order by DESC, limit 25.
...
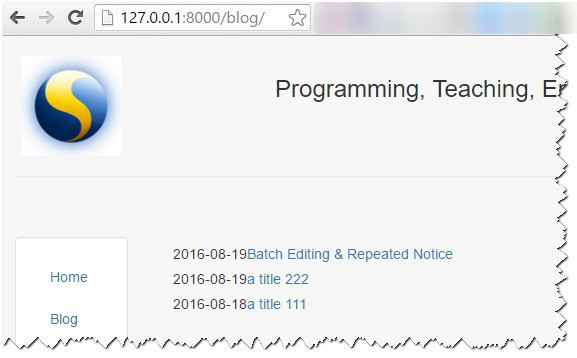
vim blog.html
{% extends "app111/headerBootstrap.html" %} {% block content %} {% for one_post in object_list %}
{{ one_post.date|date:"Y-m-d" }} {{one_post.title}}
    </br>
{% endfor %} {% endblock %}
See here for headerBootstrap.html.
Those two class-based views can be extended/enhanced by subclassing (DEF), see the blog2.views, or also official examples: for ListView and for DetailedView.
See also SingleTableView (used in my site2020proj) instead of ListView.
models.py #
Django uses models to avoid writing sql query strings directly.
vim <app folder>/models.py
models.py == the entire DB
a class == a table
a variable == a column (a column named id will be added by default, as its key)
More info here: django doc: Model field reference
from django.db import models


class Post(models.Model): # this will create a table "blog_post" in small letter format: "<app_name>_<class_name>"
    title = models.CharField(max_length = 140) # optional max_length
    body  = models.TextField()
    date  = models.DateTimeField()

    def __str__(self):
        return self.title
??? what does __str__ mean? default method/func to display current item?
Migration #
- Migration is used to initialize project’s database.
- Just like registering an app is the 1st thing to do in settings (after starting an app), migration is the most important thing for model.
- One part of migration is for the app admin, this is a default app that comes with all projects.
- As it is NOT able to undo it, so it is good to check the sql strings (before it will be run) using
sqlmigrate.
manage.py makemigrations # make migration-s
# `makemigrations` can be followed by: [optional: app name]

# optional: check sql strings (need to firstly manully find files' prefix in: <app folder>/migrations/<digital-prefix>_initial.py)
manage.py sqlmigrate <app name> <digital-prefix e.g. 0001>

# if `sqlmigrate` gives good sql query strings, run:
manage.py migrate


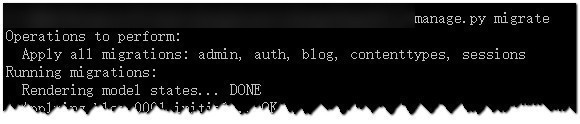
The file “db.sqlite3” will become bigger now.
The Default Admin App #
To use the admin app, we need to create a super user first.
create a super user #
manage.py createsuperuser
manage.py runserver
Go to http://127.0.0.1:8000/admin and log in.
Now, there are “admin.py” files in each <app folder>.
Make sure the models which we want to use is registered in admin.py, otherwise the /admin cannot manipulate the corresponding tables.
vim <app folder>/admin.py
from django.contrib import admin # added automatically
from blog.models import <table name, eg: Post>
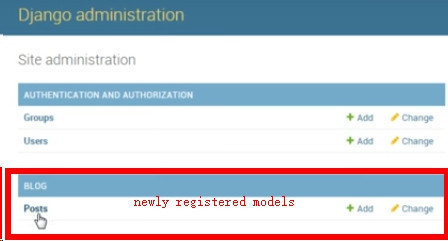
admin.site.register(<table name, eg: Post>) # Register your models here.
The site will have one more thing:
Display #
See also: a more generic view, see video.
add some test blog posts via admin app #
We can add a new post using this GUI:
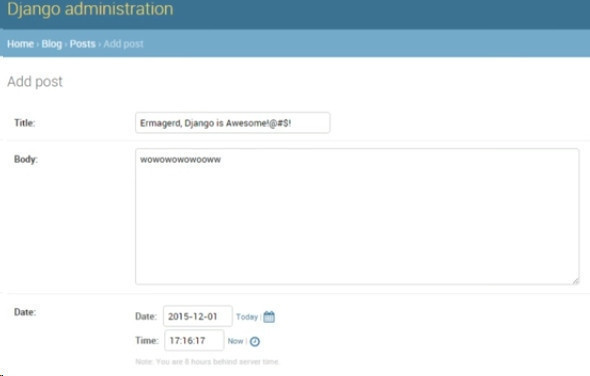
Thus, we have something to show:
add view to display a single post #
register a function-based deailed-view: #
vim <app folder>/urls.py
...
urlpatterns = [
    re_path(r'^(?P<pk>\d+)$', DetailView.as_view(model = Post, template_name = 'blog/post.html')),
...
Tip: ‘?P’ is a named (capturing) group. ‘pk’ means primary-key. doc: urls:named-groups
add the deailed-view: #
vim <app folder>/templates/<app name>/post.html
{% extends "app111/headerBootstrap.html" %}

{% block content %}
    <h3>{{post.title}}</h3>
    <h6>{{post.date}}</h6>
    {{post.body|safe|linebreaks}} <!-- the "safe" filter tells jinja that the string is safe (no need to escape html tags), so we can have html tags taking effect (come into operation) instead of escaped and displayed as plain text -->
{% endblock %}
OBS: I cannot change the word “post”, why and where is that word from? model???
Also, modify blog.html to have links to each post.
{% extends "app111/headerBootstrap.html" %}

{% block content %}
    {% for one_post in object_list %}
    <h5>{{ one_post.date|date:"Y-m-d" }}<a href="/blog/{{one_post.id}}">{{one_post.title}}</a></h5> <!-- jinja: apply a filter to format date -->
    {% endfor %}
{% endblock %}
Model Form #
It would be necessary to have seperate forms/urls for normal users instead of uing the admin app.
add a form for creating a post (in the model/db-table) #
post creation commit diff (in app blog2).
Note, base.html is used for the app blog2, a base template is the frame for all pages in the app, thus usually a big file.
add html files: #
Add form html file, which MUST be named as <model name>_form.html i.e. “post_form.html” here (commit).
Besides, form-group is suggested to have another separate file (any filename, called within <model name>_form.html ), e.g. form-group-template.html or form_template etc. (commit).
add a view in views.py: #
...
from django.views.generic.edit import CreateView

class PostCreate(CreateView):
     model = Post
     fields = ['title', 'body', 'date']
add route in app urls.py: #
...
urlpatterns = [
    path('post/create/', views.PostCreate.as_view(), name='post-create')
...
success insert-db redirection in models.py via reverse() #
...
from django.urls import reverse  # or import reverse_lazy
# OBS: diff django v1: from django.core.urlresolvers import reverse

    def get_absolute_url(self):
        return reverse('blog2:detail', kwargs={'pk': self.pk}) # form inserted into db, then redirect to this url.
add corresponding namespace in main urls.py: #
OBS: Namespace is used for ReverseMatch.
...
urlpatterns = [
    path('blog2/', include(('blog2.urls', 'blog2'), namespace='blog2')),  # OBS: diff django v1
...
add corresponding name in app urls.py: #
...
urlpatterns = [
    re_path(r'^(?P<pk>\d+)$', views.DetailView.as_view(), name='detail'),
...
update & delete #
code see commit diff
OBS: “GET” deletion requires confirmation (i.e. via post_confirm_delete.html), but “POST” does NOT.
ref: video
Passing Parameters/Variables #
function-based view to jinja #
See above in the tutorial.
browser/client to class-based View using post/get (NOT tried) #
self.request...
request.GET['my_key'] # the key MUST exists, otherwise an exception
request.GET.get('my_key', <some_default_value>) # the key may exists, otherwise HttpResponseBadRequest() by default

request.query_params.get('status', None) # for GET
request.data.get('role', None) # for POST
browser/client to class-based View using named url parts from urls.py #
using to set form default values (in class-based View): #
class AbcView(CreateView):
    ...

    def get_initial(self):
        # school = get_object_or_404(models.School, school_pk=self.kwargs.get('school_pk'))
        return {
            var1 = self.kwargs['var'],
            # or:
            var1 = self.kwargs.get('var', <default_value>),
        }
using to query db (in class-based View): #
Usually in views.py, e.g. the_select_item = MyModel.objects.get(pk=var1).
class-based view to jinja template/js (by updating context)
#
# in views.py
class AbcView(generic.ListView):
    var1 = 'asdf'

    def get_context_data(self, **kwargs):
        context = super(BatchListView, self).get_context_data(**kwargs)
        context.update({'var1': self.var1})
        return context
<!-- use var1 in jinja html template -->
    {% if var1 %} <!-- if var1 is defined -->
        ...
    {% else %}
        ...
    {% endif %}
WARN: {% if var1 is defined %} checking will not work.
toast (floating-message) #
In views.py:
from django.contrib import messages

messages.success(request, "ok")
messages.info(request, "aaa")
messages.warning(request, "aaa")
messages.error(request, "danger")
messages.debug(request, "aaa")
Later in front end .html:
bootoast can be used which works with bootstrap 3 & 4.
<link rel="stylesheet" href="{% static 'css/bootstrap.min.css' %}" type="text/css" />
<link rel="stylesheet" href="{% static 'css/bootoast.css' %}" type="text/css" />
<script src="{% static 'js/jquery-3.5.1.min.js' %}"></script>
<script src="{% static 'js/bootoast.js' %}"></script>

{% if messages %} {% for message in messages %} {% if message.tags == 'success' %}
<script>
  bootoast({
    message: "{{message}}",
    timeout: 3,
    type: "{{ message.tags }}",
  });
</script>
{% elif message.tags == 'info' %}
<script>
  bootoast({
    message: "{{message}}",
    timeout: 3,
    type: "info",
  });
</script>
{% elif message.tags == 'warning' %}
<script>
  bootoast({
    message: "{{message}}",
    timeout: 3,
    type: "warning",
  });
</script>
{% elif message.tags == 'error' %}
<script>
  bootoast({
    message: "{{message}}",
    timeout: 3,
    type: "danger",
  });
</script>
{% endif %} {% endfor %} {% endif %}
File Uplad #
upload to mysql file-field column #
see video
upload to folder with filename in db #
+ function-based view
see sunny’s implementation, (ref: minimal-django-file-upload-example)
+ class-based view
//to be cont.
multi filenames in mysql’s one record/row’s #
//to be cont.
Put Online #
Situation 1: we already have a project online.
We just need to copy the apps and db file to the existing project container folder, then modify settings.py to register the new apps. This is what the tutorial video did.
Situation 2: new project.
//to be cont.
Restful API with Angular - A Shopping List Demo #
(Very Simple Demo with Json)
- George Kappel 2013 video (backed up as: django-rest-framework and angularjs.mp4)
- code with db
See Shopping List Demo for the rest Angular part. Below is the API part.
George’s video is not giving clear explaination for beginners, see Chris Hawkes 2015 video for clear explaination to understand. However, Chris did not provide code, we can continue to use the app “blog”. (video backed up as: how-to-create-a-RESTful-API-with-Django-in-20-minutes.mp4)
Virtualenv
OBS: This demo is old, and needs Python 2.7.
If we run using py3: NameError: name 'unicode' is not defined.
We can use virtual env to solve this problem.
Migrate Database
The original code does not contain a db file (I added to my github repo), so we need to do migration which requires django 1.7 or higher. It is different to the freezed 1.5, we can do this with another venv. See LearnDjango for more info.
C:\Users\user_name\Envs\py27_rest_demo\Scripts\python.exe manage.py makemigrations
C:\Users\user_name\Envs\py27_rest_demo\Scripts\python.exe manage.py migrate
rest_framework install & settings #
pip install --prefer-binary djangorestframework
vim <project setting folder>/settings.py
...
INSTALLED_APPS = [
    'rest_framework',
...

# add the following control (otherwise, default settings allow: GET, POST, HEAD, OPTIONS)
REST_FRAMEWORK = {
    'DEFAULT_PERMISSION_CLASSES': ['rest_framework.permissions.DjangoModelPermissionsOrAnonReadOnly']
}
...
serializers in views.py (app) #
vim views.py
from rest_framework import generics, serializers
from .models import Post


class PostSerializer(serializers.ModelSerializer):
    class Meta:
        model = Post # model/table name
        field = ('id', 'title', 'body', 'date') # some/all columns in the corresponding table


class PostList(generics.ListCreateAPIView):
    queryset = Post.objects.all()
    serializer_class = PostSerializer


class PostDetail(generics.RetrieveUpdateDestroyAPIView):
    queryset = Post.objects.all()
    serializer_class = PostSerializer
Tip: Chris Hawkes has many serializers, so he created a dedicated file “serializers.py” for serializers, then import it in views.py.
urls.py (project & app) #
vim <project setting folder>/urls.py
urlpatterns = [
    url(r'^api/', include('<app name>.urls', namespace='rest_framework')),
...
vim <app folder>/urls.py
urlpatterns = [
    url(r'^posts/$', PostList.as_view()),
    url(r'^post/(?P<pk>\d+)$', PostDetail.as_view()),
...
User Sessions #
Sessions are enabled by default which can be seen in settings.py:
LOGIN_URL = '/my-login_url/'

INSTALLED_APPS = [
...
    'django.contrib.sessions',
...
]

MIDDLEWARE = [
...
    'django.contrib.sessions.middleware.SessionMiddleware',
...
]
Going through ‘urls.py’ and ending in ‘views.py’:
from django.contrib.auth import authenticate, login, logout

def user_login(request):
    if request.method == 'POST':
        form = AuthenticationForm(request, data=request.POST)
        if form.is_valid():  # verify passwd, but not actually login
            username = form.cleaned_data.get('username')
            password = form.cleaned_data.get('password')
            user = authenticate(request, username=username, password=password)
            if user is not None:
                login(request, user)
                messages.success(request, "Login success")
                return redirect("myapp:url-name")
        else:
            messages.error(request, "用户名或密码错误。")
    form = AuthenticationForm()
    return render(request,
                  'myapp/my_template.html',
                  {'form': form}
                  )

def user_logout(request):
    logout(request)
    return redirect("density:User-login")
Still in views.py or other access points such as API DEF file, decorate functions using @login_required and modify classes using LoginRequiredMixin.
@login_required
def some_func_needs_authentication(request):
    pass


class MyView(LoginRequiredMixin, AbcView):
    pass
For front-end, do:
{% if user.is_authenticated %} some basic menu ... {% endif %} {% if user.is_superuser %} some restricted menu ... {% endif %}
Tip: user status should be set to at leat active/working state so that the user can login.
Extra Tips #
- 14 PyCharm Plugins;
- pyinstaller -> js MIME as plain/text so not executable, see pyinstaller;
- set
max_agewhenresponse.set_cookies()otherwise different browsers actdifferently;
4 PyCharm Plugins](https://mp.weixin.qq.com/s/95KOSyWXN2A4gwZPrFdhvw); - pyinstaller -> js MIME as plain/text so not executable, see pyinstaller;
- set
max_agewhenresponse.set_cookies()otherwise different browsers actdifferently;
